

Collect leads
Save the name, email, and phone number of visitors who want your team to get in touch.
Collect leads saves the contact details of people who want to hear from you: someone asking for a demo, a quote, a call back, or a fitting appointment. Your agent can show a short form in the chat, or pick up the details from the conversation.
Where to find it: open your agent, go to Build → Actions, and select Collect leads.
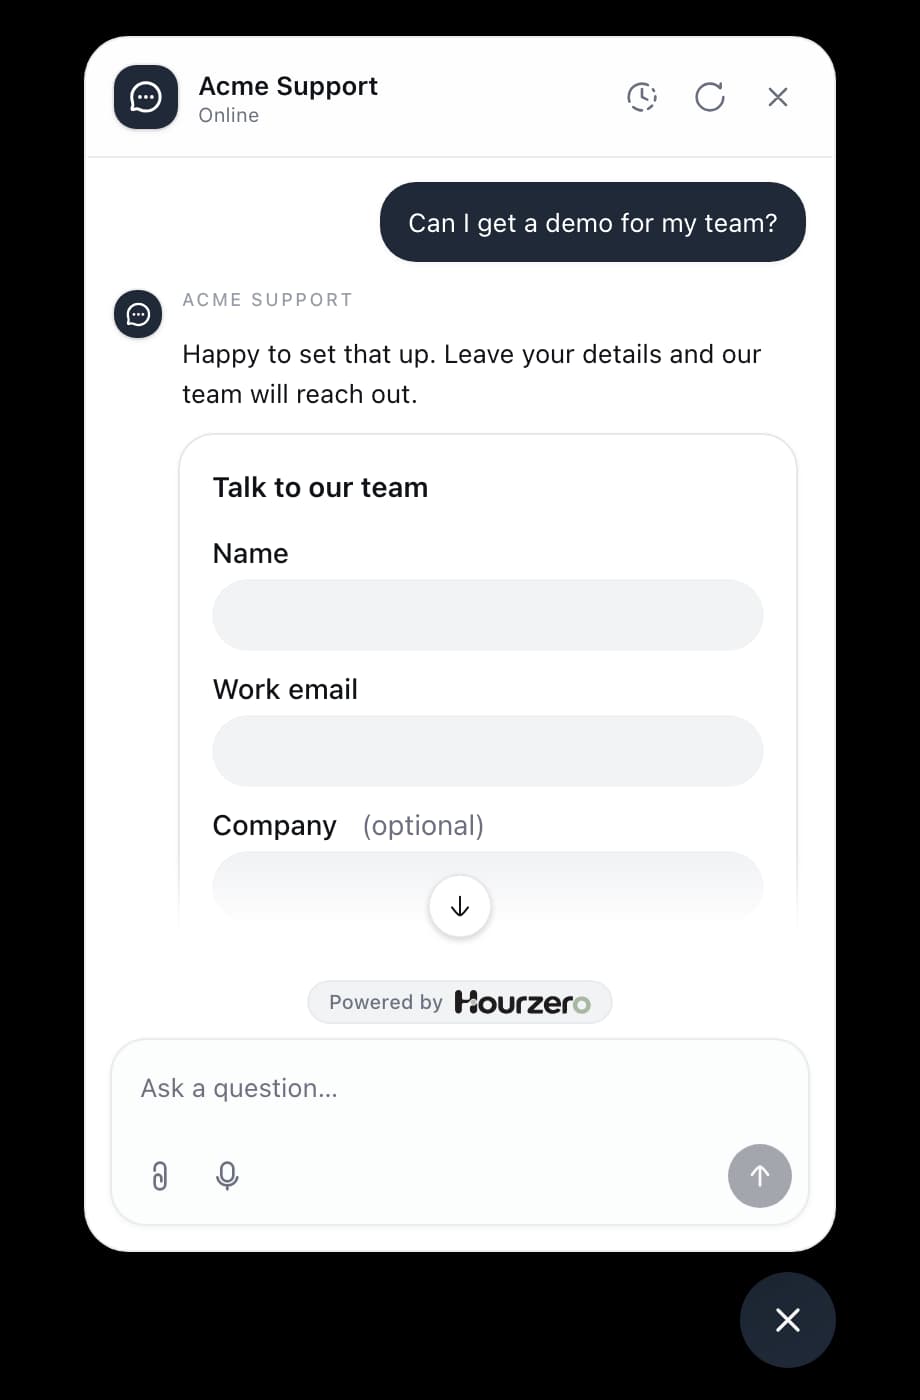
How it works
- 1Visitor asks"Can I get a demo for my team?"
- 2Agent collectsIt shows a form, or asks in the chat.
- 3Lead savedThe details appear on Activity → Leads.
- 4You follow upYour team gets in touch with the person.
Saving a lead records the request. It doesn't contact the person for you, so make sure someone on your team checks Activity → Leads, or send new leads to another tool with a webhook.
Choose Form or Auto
Under Collection method, pick how the details are gathered.
| Method | What the visitor sees | Best for |
|---|---|---|
| Form | A short form in the chat that they fill in and submit | Your website chat, where you want clear, typed-in details |
| Auto | No form. The agent asks for what it needs in the conversation | Messaging apps like WhatsApp, and natural, chatty flows |
With Auto, the agent only asks for required details it doesn't have yet, and saves the lead as soon as it has them. If the visitor already said "I'm Nina from Brightlane, nina@brightlane.io", the agent won't ask again.
Note
Forms only appear in your website chat (Chat Bubble, Help Page, and Center Stage). On WhatsApp, Messenger, Instagram, Slack, Discord, Telegram, and SMS, use Auto, or turn the action off for those channels.
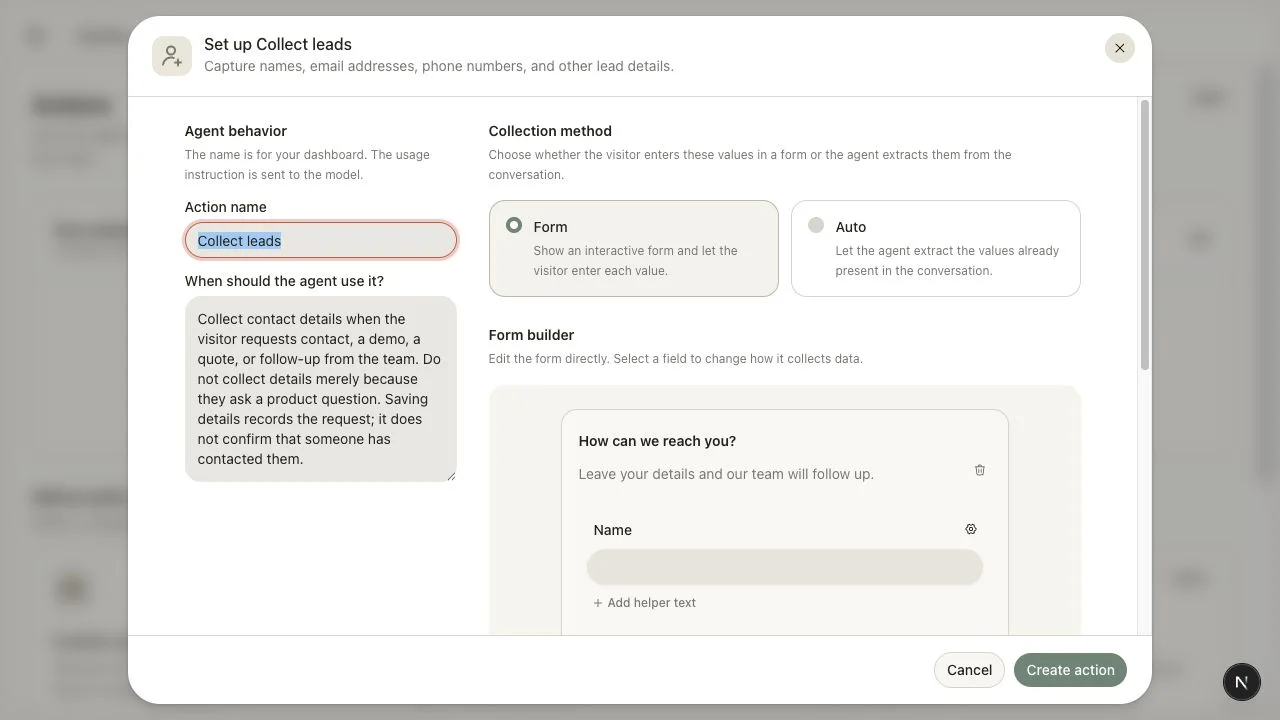
Set up a lead form
This example creates the Talk to our team form shown above.
-
Open Build → Actions and select Collect leads.
-
In Action name, enter
Demo request. -
In When should the agent use it?, enter:
Use when a visitor asks for a demo, a quote, or for someone to contact them. Answer their product question first. Don't collect details from people who are only browsing. -
Under Collection method, choose Form.
-
In the Form builder, select the title "How can we reach you?" and type
Talk to our team. To change or remove the line under it, edit the description or select its trash icon. -
The form starts with Name, Email, and an optional Phone field. Select the label Email and type
Work email. -
Select the Phone field, then select Remove in its Field settings.
-
Select Add field. Name the new field
Company, open its settings, and turn off Required field. Optional fields show "(optional)" next to their label. -
Select the button at the bottom of the form ("Send details") to change its text, for example
Send. -
Under After submission, edit the message the visitor sees once they submit, for example
Thanks! Someone from our team will email you within one business day. -
Select Create action.
Field settings
Select any field to open its Field settings:
- Field type: Short text, Long text, Email, Phone, Number, Yes / no, or Select.
- Field key: a short code created from the label. It's used in exports and webhooks, so you don't need to change it.
- Contact field: links the field to the contact's Name, Email, or Phone. See Link fields to the contact.
- Options: for Select fields. Enter the choices separated by commas, for example
1-10, 11-50, 51+. - Required field: when on, the visitor can't submit the form without filling it in.
Select Add helper text under a field to add a short hint, like "We'll only use this to arrange your demo." A form can have up to 20 fields.
Tip
Ask for as little as you can. A form with two or three fields gets filled in far more often than one with eight. You can always ask for more on the follow-up call.
Set up Auto collection
- Under Collection method, choose Auto.
- In the Fields section, set up each detail the agent should collect: Label, Type, Contact field, Description, and Required. The Description helps the agent understand what belongs in the field, for example "The visitor's work email, not a personal address."
- Select Add field for more details.
- Under Confirmation, write the Success message. The agent uses it to confirm what was saved.
- Select Create action (or Save changes).
Link fields to the contact
When a field's Contact field is set to Name, Email, or Phone, a submitted lead fills in that detail on the visitor's contact record. That way you know that the visitor who asked for a demo is Nina Alvarez from Brightlane.
- New lead forms link Name, Email, and Phone for you.
- Only link a field that really is that detail. Don't link a "Company phone" field to the contact's Phone.
- Fields set to Do not map are still saved with the lead. They just don't change the contact.
- Contacts are only updated from live channels. Leads you submit while testing in the Playground don't change any contact.
See and export your leads
Every saved lead appears on Activity → Leads, with the action, the person, the collected values, the channel, and when it was submitted.
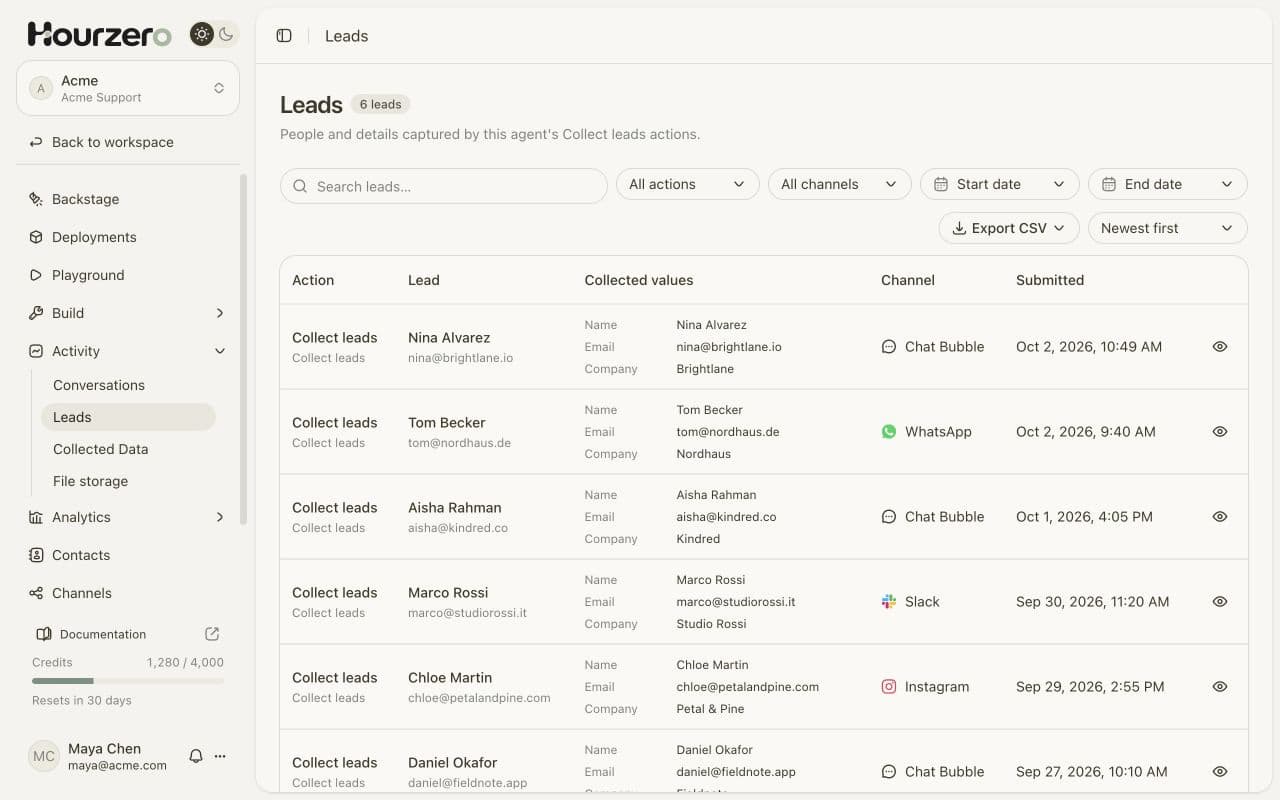
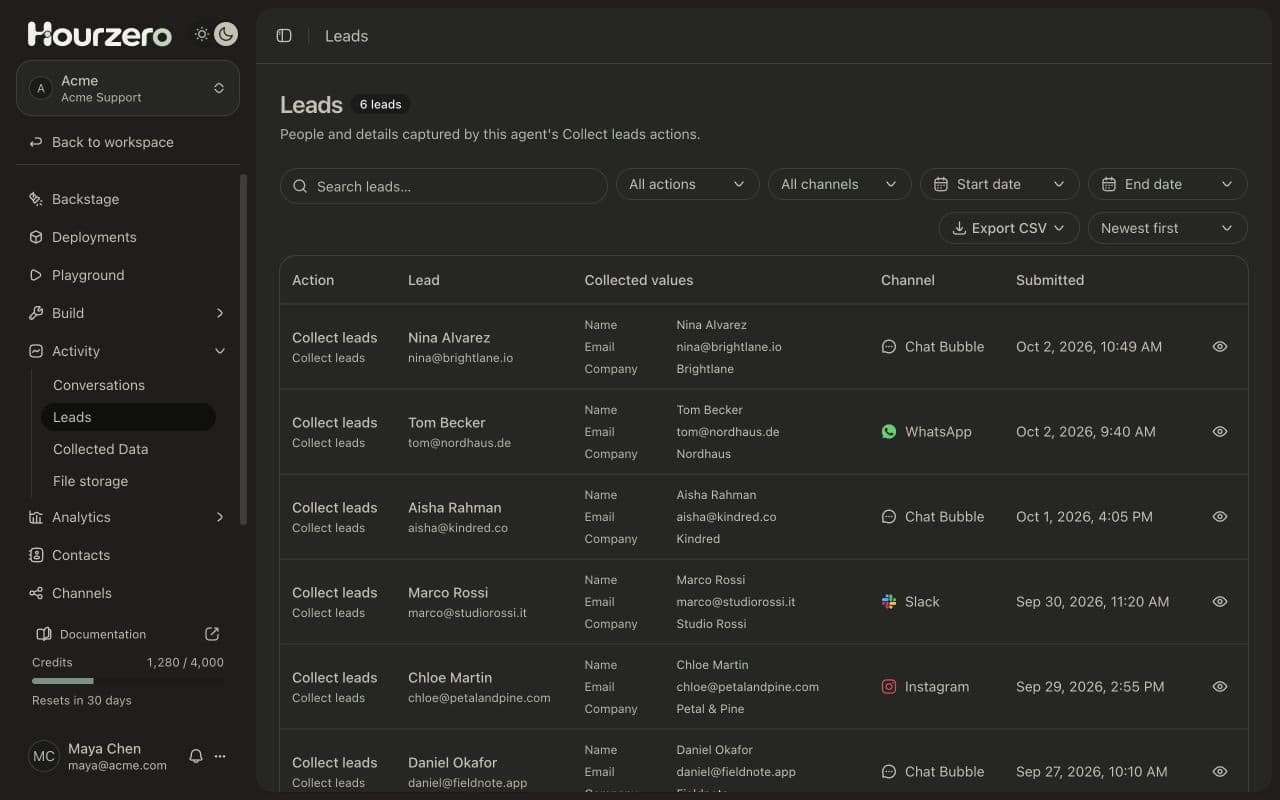
From there you can:
- Search across all collected values.
- Filter by action, channel (including Playground for your tests), and date range.
- Sort by Newest first or oldest first.
- Select the eye icon on a row to see every value, the contact details, and the conversation it came from.
- Select Export CSV, then Export all or Export matched entries to download a spreadsheet.
For more on these pages, see Leads and collected data. To send each new lead to your CRM or another tool automatically, set up a webhook for the lead.created event.
Test it
- In Playground, check that the action is switched on for your channel in the Capabilities tab, and select Save draft.
- Ask "Can I get a demo?" The form should appear, or with Auto, the agent should ask for your details.
- Fill it in and submit. Check that the success message makes sense.
- Ask a general question, like "What's your return policy?" The agent should answer without asking for your details.
- Open Activity → Leads, filter by Playground, and check the saved lead.
- Publish the channel when you're happy.
Common questions
Can the visitor say no?
Yes. Every form has a Cancel button next to the submit button. If the visitor cancels, nothing is saved.
Does the agent promise that someone will call?
Not unless you say so. By default the agent only confirms that the details were saved. If your team really does follow up within a set time, put that in the success message.
Why don't I see the form on WhatsApp?
Messaging apps only receive text. Switch the action to Auto, or create a second Collect leads action in Auto mode and turn it on only for your messaging channels.